Showing posts with label puppet design. Show all posts

Thursday, June 21, 2012

Behind the Scenes at Green Screen Shoot

We just finished up a green screen shoot with the puppets last night. Here are a few pictures to share what the two days were like.
I  manipulated the puppets to a soundtrack we've already created with voice actors. We shoot each puppet individually then Lee composites them in the desired layout. In that way it is much like a traditional animation process.

Lee is responsible for the cameras, lighting, capture equipment and anything technical.


The characters waiting for their cue.


When shooting this way the image that I am seeing in the monitor is opposite to what my arm is doing. This always takes good bit of practice to get right.
A few of our puppets have too much green in their skin and costumes to shoot in front of the green screen, so we have to put up a make shift blue screen for their footage.

Friday, March 16, 2012

Kids Say The Darndest Things


I recently had the pleasure (and pressure) of screening our film in front of over 150 very sharp 8-11 year olds By showing the unfinished version of UG3 to this target focus group, we were able to gain important insights into what is working and what we need to improve. The most amazing thing about these kids was the maturity with which they approached the whole experience . Right now the film is in animatic form. There is some finished animation along with segments of composited footage, but the majority of the 30 minute film is an assortment of rough to polished storyboards sequenced to a working soundtrack.  But the students took all of that in stride and gave in to the humor of the characters and content that engaged them. They were a great audience.

The focus groups came about through the help of five incredible SAGE teachers here in Henry County. Cindy Carmack of Rock Spring Elementary; Cindy Fuqua of Red Oak Elementary; Diane Harris of Luella Elementary; Lisa Henriquez of Flippen Elementary and Paula Whipple of Mt. Carmel Elementary arranged for me to come to their classes as a guest speaker. It worked out because they were doing a segment on Space Exploration which happens to be the subject of UG3. I spoke about film making, introduced the characters of the film, showed some of the puppets, stop-motion models, artwork and some finished shorts based on the cast of the longer film. Then we watched the film-in-progress.

After the audience asked questions they took time to fill out an extensive questionnaire .And they were honest, which is what I’d hoped for and dreaded. What came out of that was insight into a few weaknesses that we’ve worked on changing. But there was also a huge amount of encouragement when I saw what they were most enthusiastic about.  The best thing for me (as any filmmaker can attest to) was sitting in a room full of people and hearing them respond to something that you’ve worked so hard on and believed in.  So I must say again to Ms. Carmack, Ms. Fuqua, Ms. Harris, Ms. Henriquez and Ms. Whipple thank you very much for this chance to share with your students.

The goal is to finish as much of the animation by the end of the school year to go back and present a more polished version of UG3 to the same classes and let them experience a little more of the art of film making.

Friday, March 9, 2012

Aliens In the Hatchback

Just loaded up the crew to head up to Tennessee for another shoot. We'll be doing some promotional stuff over the next few days. I just hope no one rear-ends the Highlander.

Tuesday, August 9, 2011

Screever - Hand Puppet Version

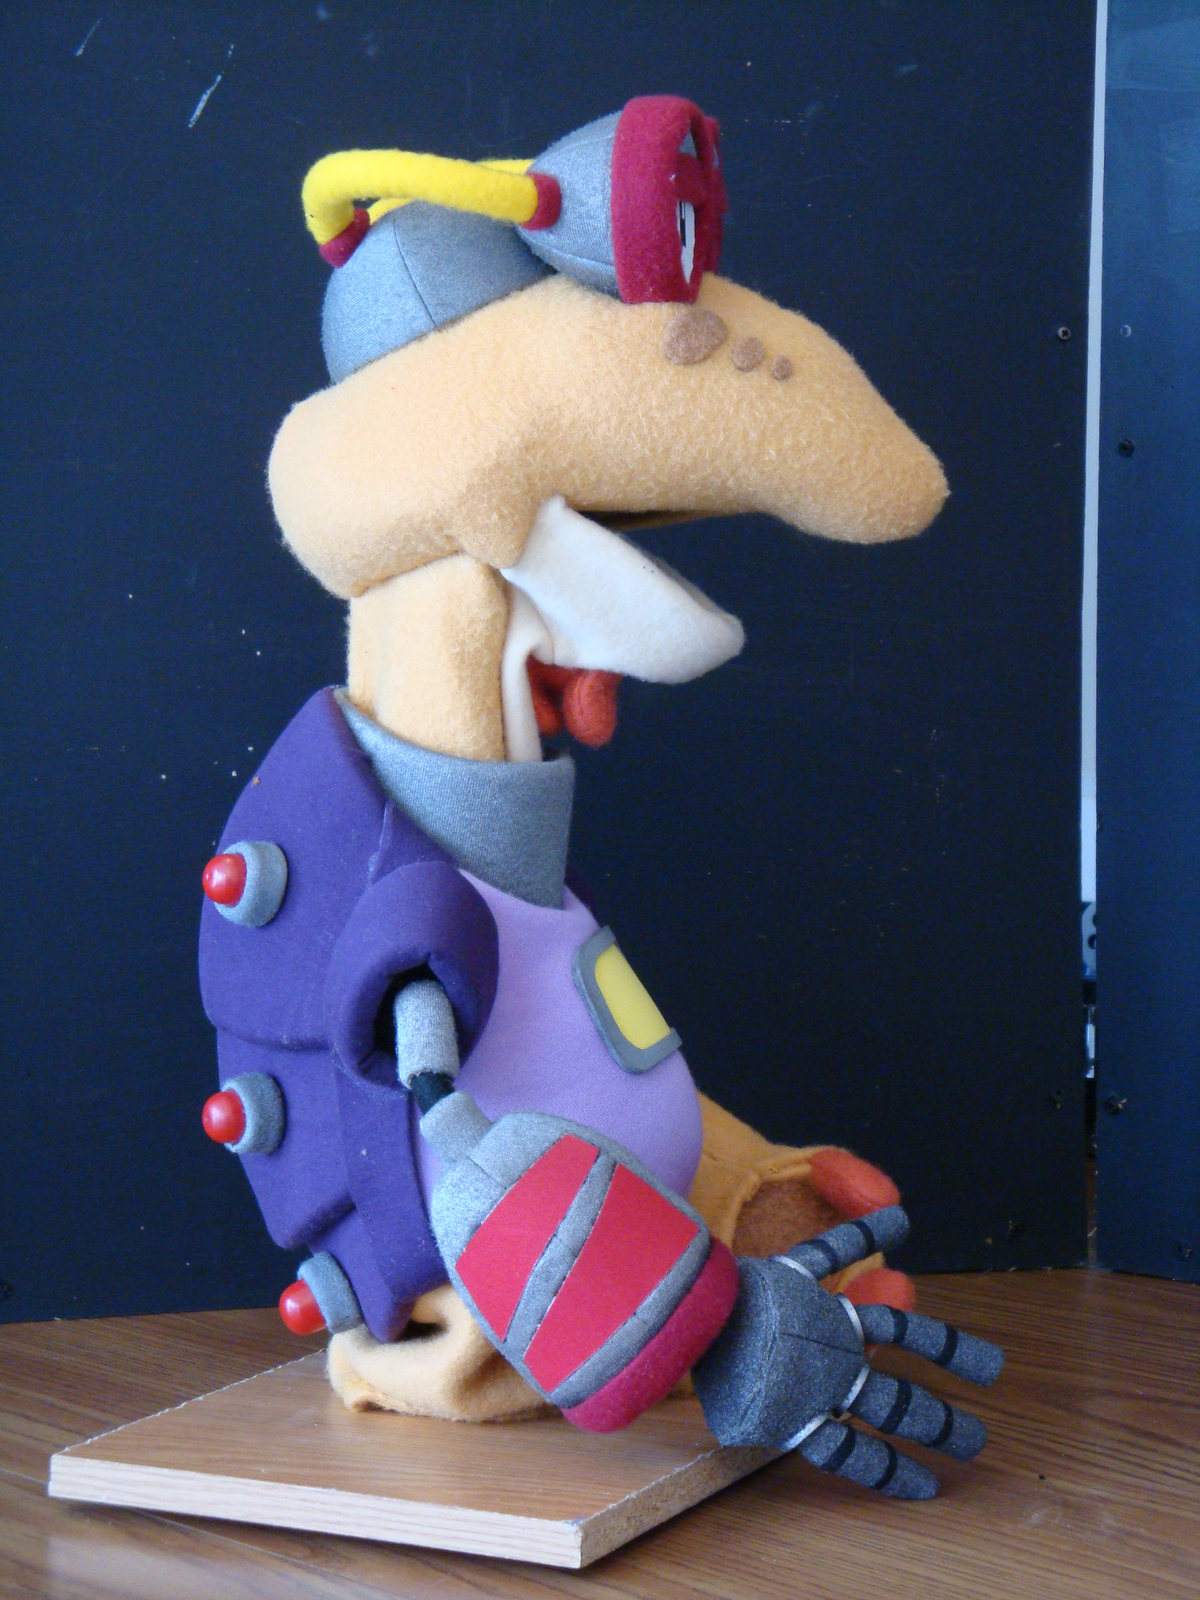
Here's the hand puppet version of Screever. Due to all the challenges and details, this puppet took about 1/3 longer to make than the previous two puppets. His cyborg arm has a removable hand so that we can give him other functions. One of his specialties is that he creates illustrations and graphics for their reports. He'll use the special features of his arm to create these in unique way. I'll also be making a larger stop-mo version of the arm so we can do close up shots of the arm changing.


Blepharon - Hand Puppet Version


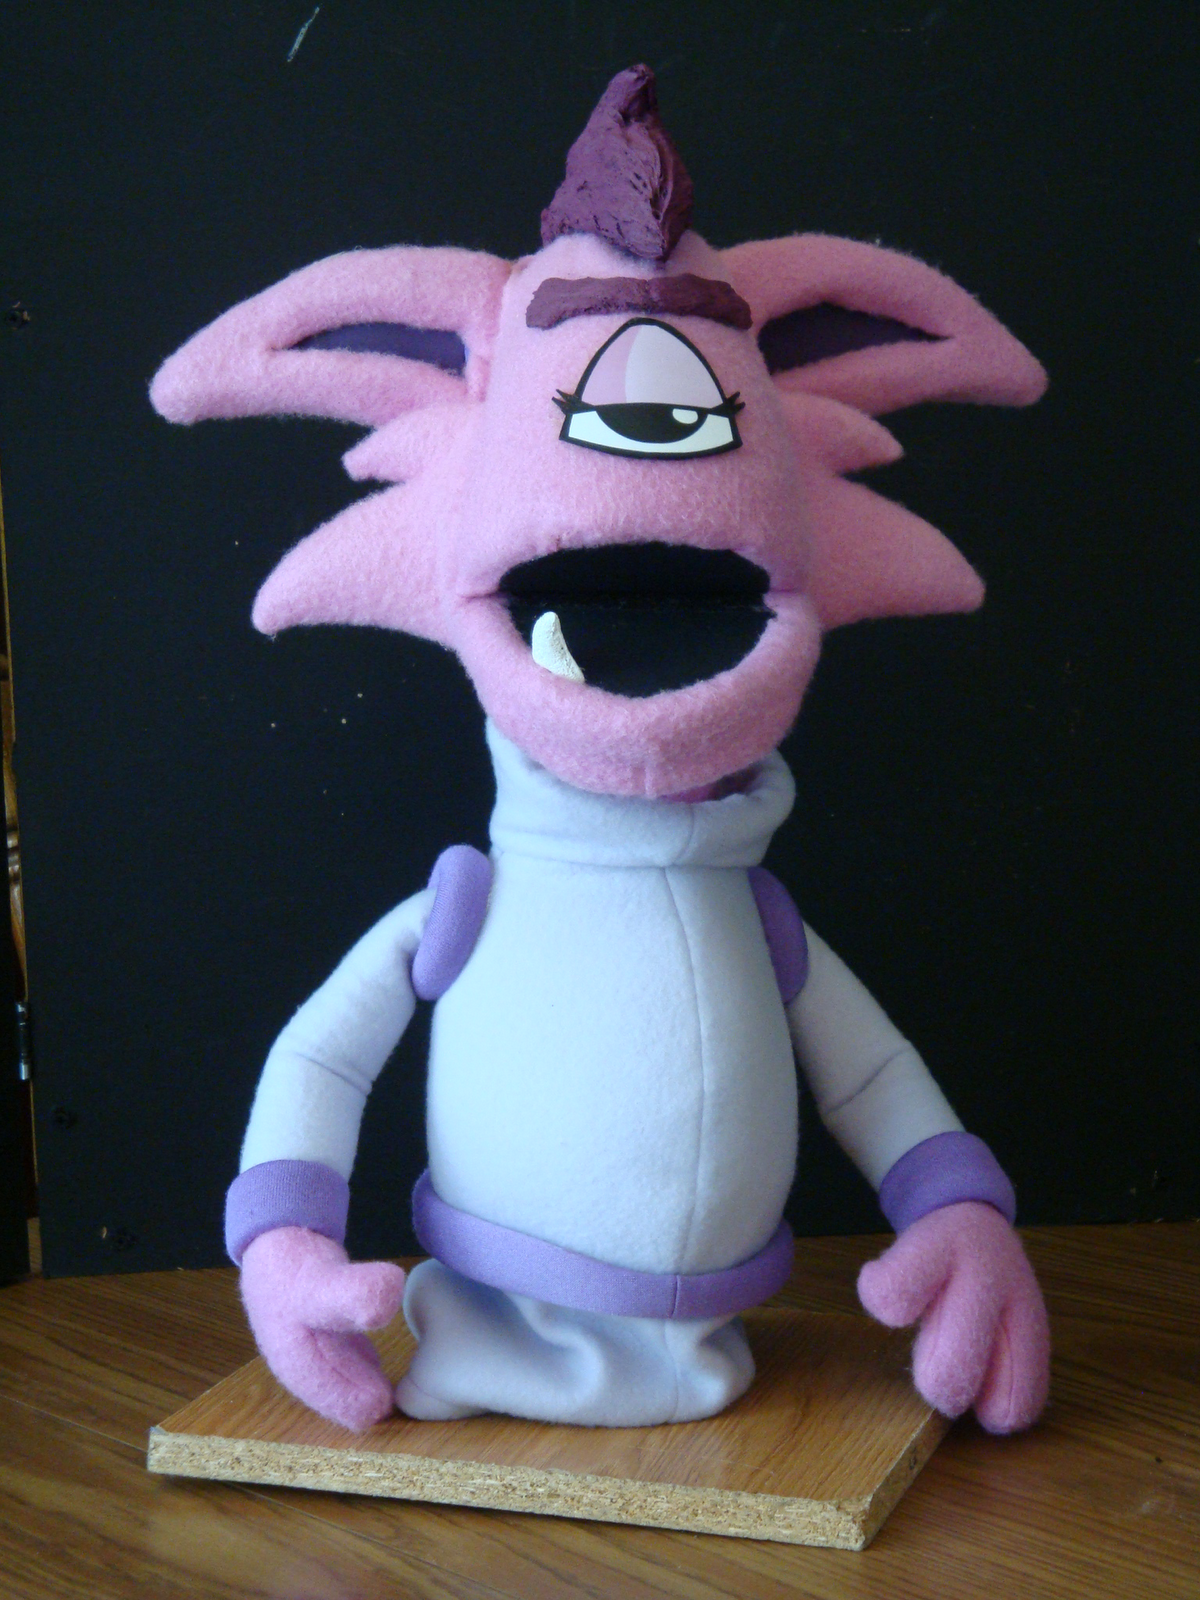
The next puppet I made after Thunderstone and Fang (see previous posts) was Blepharon or "The Bleeph". One particular challenge was that he's a little more rotund than the other characters. Hand puppets usually have most of the audience attention on the face, since this is where they do most of their acting. So I cut back on the torso size. 

It's important to keep the weight down on a hand puppet whenever possible since even a few ounces can make a big difference on how long a puppeteer can keep a puppet elevated without wearing out their performance arm. Oh, and I decided to leave off the one exposed tooth since I had used that element in the Fang character.

Fang - Hand Puppet Version


Here's the hand puppet version of Fang. The colors on her clothing have been changed slightly from the Flash Animation Character sheet below.
It's both challenging and exciting creatively to take a 2-D version of a character and interpreting it three dimensionally. To see other entries regarding Fang click on the keywords highlighted below. 

Thunderstone - Hand Puppet Version

I haven't posted in 2 moths but I have been busy. We've decided to jump into the full length episodes that focus on the exploration of space. Since these episodes will be approximately 30 minutes in length we're going to use puppetry to replace some opportunities for animation. This will keep our production time shorter and costs down.


This is the puppet version of Thunderstone. He's a good bit larger than the original stop motion version below. 
 I tried hard to keep the hand puppet version as close to the stop-mo version as possible.

Thursday, January 13, 2011

The Complete Thunderstone

I first posted pics of Thunderstone's Head here. Well here's the head attached to the finished body to complete an animatable stop-motion puppet.

What follows are pics of the armature making process and then the fleshing out of the form and clothing. Here are the rough sketch/plans I made before beginning the body.

Here is the armature made from aluminum wire, balsa and hard wood, plumber's putty and metal foil rolled into tubes.


Here are a few detail shots.


Next came a body made from foam rubber and some exposed areas covered in latex and painted with acrylic. 

A good deal more work went into the clothing. Most of it was made from white gym socks and an old sweater. Sounds gross but it was all clean. I hope to have some test animations of him up soon. 


Sunday, September 19, 2010

The Kneelsun Kids

Here are preliminary/discovery sketches of two stop-motion characters. They are two alien kids who sit in front of the television set and make funny comments between segments of the show. They inadvertently help to introduce a new segment or tie up a finished one. 

The older sibling is Arbed. I've got the basic body structure but still not sure about the hair.

Next is her little brother Eel.

 Maybe you can see there is some Chuck Jones influence. In fact I want these two to be very much like the two boys in the Looney Tunes short Zip, Zip Hooray... just an alien stop-mo version of them.
  

Here's some idea/self-direction on how to make the eye pods so they can be more animatable with less construction worries. 
 

Tuesday, July 6, 2010

A Stop-Motion Puppet - "Schnug-He"


Meet Schnug-He. He's a stop-motion puppet I'm going to be using for section breaks in the film. He'll be a part of short 10 or 15 second animations with his nemesis Rhumbah. There will be more about these animations later but right now I wanted to take you through the steps of creating him.

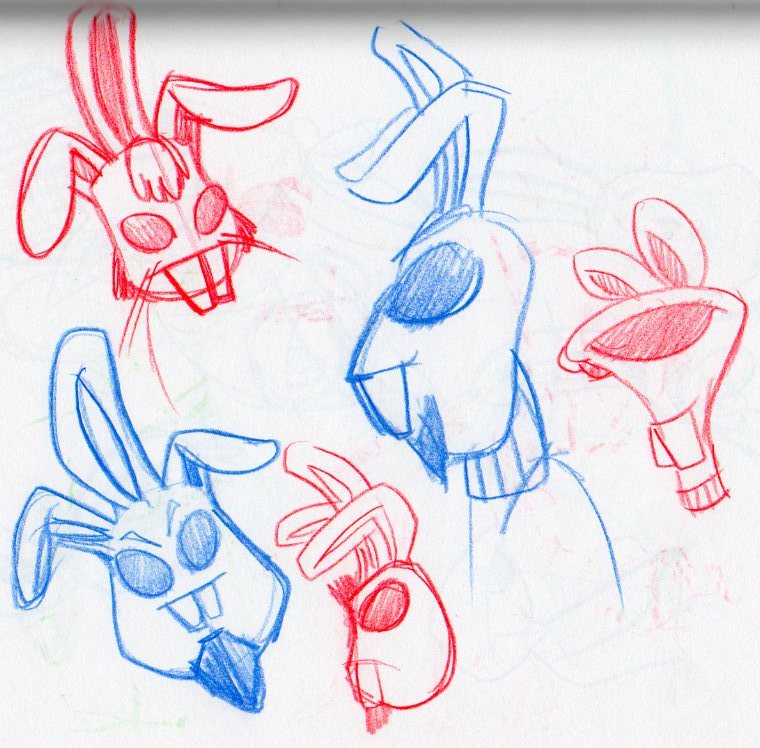
First some sketches. This is where I was trying to find out how I wanted the character to look.
As you can see I had a rabbit in mind from the beginning, but I needed to bring a bit more into the mix. Finally I settled on the general design below.


Here is a simple turn around I would use for the design and armature layout.
The sketch is messed up a bit because when making the armature I actually lay the materials out on the sketch for measurements and my hands were usually wet or messy. Below is the same sketch but with the armature sketched out on top.


From here I made the armature. This technique I learned from Becky Wible-Searles in my Stop-Mo classes at SCAD. It's simple 16-gauge armature wire twisted for durability and a plumber's repair epoxy to form the stiff welds. This works to create a skeleton or armature that I can pose.

Next came the masses of the body created around the armature.
I made this using foam rubber and contact cement. It is a technique I learned making hand puppets. You cut the flat foam rubber in shapes that, when glued together create the forms you see. 


Now I covered it with a material called antron fleece or Muppet fleece. It comes in white but was dyed to this color.
I didn't have to cover the entire puppet because it would be wearing a robe over most of its body. Many times when I use the antron fleece I use a sewing machine but this time I was able to do this with only a hot glue gun. 

Here's the robe. Made with regular material and a sewing machine.


A lot happened after this step. The details came with a few mistakes followed by creative problem solving. Here's what came out.
What came out was kind of a rabbit/insect/dinosaur/cyborg/Jedi alien.